Showing posts with label Cellar 4. Show all posts

Sunday, 8 June 2014

The heat is on.

We've been keeping the pace up the past couple of weeks, trying to keep to our goal of getting the wall plastering started as soon as possible. This of course means any remaining wall heating has to be installed which in turn means all the underconstruction has to be completed before the heating panels can be stuck on. This is now complete in my favourite room on the second floor, as well as starting to close the hole in he ceiling up to the next level.


It actually makes the room feel larger and a little brighter, as the old plaster and wood behind these panels wasn't the most reflective.


Having said that, I thought I'd include myself in a photo for a change, to give some sort of scale. And I'm not a tall man! Nevertheless, despite the low ceiling, it's roomy enough, and definitely cosy.


The past few days have been spent sorting the kitchen out, as it has been neglected for quite a while. The mesh has been nailed to the ceiling to carry new clay plaster.


The gaping hole where the old chimney went has a new beam bolted to the others and laths installed ready to receive plasterboard.

Best of all, we finally closed off the wall behind which the spaghetti of cables and timber frames is hidden. Suddenly the kitchen feels cleaner and bigger.


And staying in the kitchen, the west wall was being prepped for fresh plaster by chopping off any loose stuff and keying the surface. While doing this, the big lumps were coming easily off the remaining chimney, revealing red brick. I hasn't thought his might be red brick, but it makes sense for a chimney.


Thinking this would make a nice feature, i removed all the plaster and then cleaned each brick with a nylon brush attachment on a drill, with quite nice results. All that's left to do is to scratch out some of the old mortar and repoint. I've plenty of experience of that!


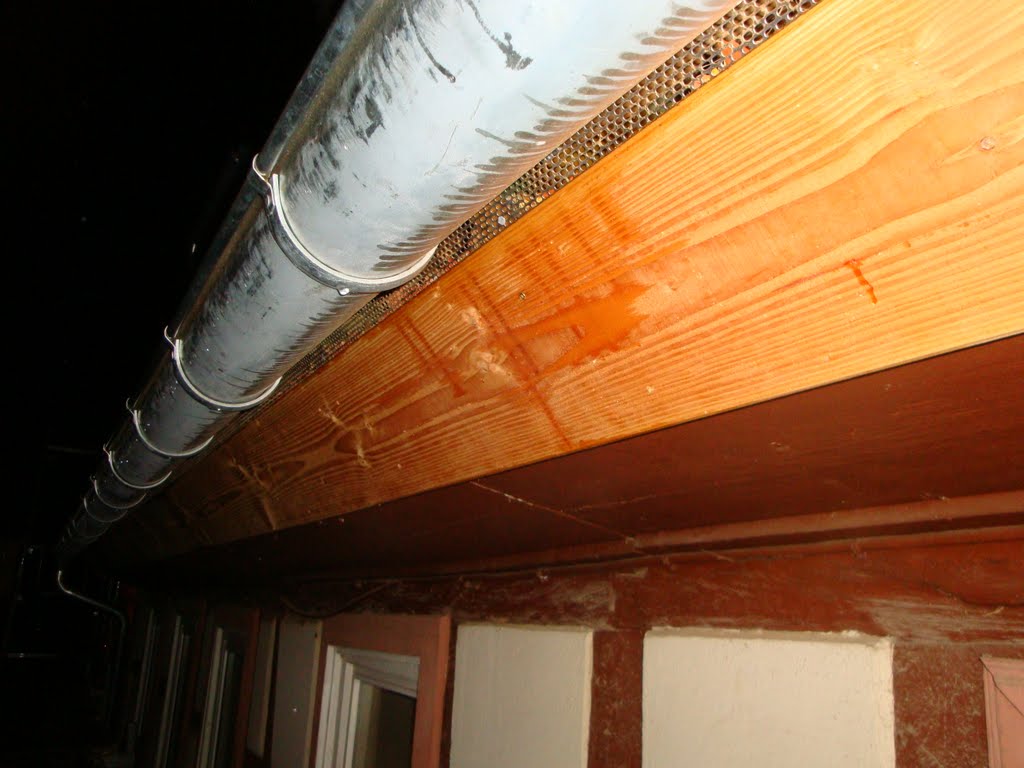
Meanwhile, down in the cellar, Sace popped by yesterday and hooked up the wall heating in the bedroom and office (these designations are subject to change!), so now three rooms are running on the heating system Not that we need heating right now!


 We've now a list of tasks that we need to complete in two weeks, if we want to stay on target and start plastering. Apparently our kitchen is coming in August! I doubt it...

Sunday, 8 December 2013

Contact

A little over a week ago was a major milestone, as the heat pump was turned on for the first time. The big propeller is turning and the pumps are pumping, adding a sound of life to the cellar.  Not exactly something that is easy to show in photos, but look, there's a pump running! The system in the living room, the pufferspeicher and the heat pump itself were filled and set running. It's working away with fairly efficient numbers of 4:1, and is just taking the edge off the cold inside the house.


In the meantime, we built a small bit of scaffolding in order to do some work on the awning over the main barn door. The gutters here were broken for the past two-and-a-half years, since the original scaffolding for the house work was erected, meaning that water had been pouring onto the corner of the house all that time. This has resulted in a pretty damp spot in the cellar at that corner. We've now got nice, shiny new gutters, and the piece of roof I had to truncate has been retiled.


In a way, it was probably a mistake to repoint that part of the cellar wall before it dried out, but it will, I hope, eventually.


And, finally, I made some progress on the ceiling underconstruction in the same cellar. The idea is to insulate the ceiling with 120mm of rockwool, or similar, then seal it off with plasterboard or Fermacell. It was all going swimmingly till I ran out of timber, but I got a delivery of 330 metres last Friday night, so that should keep me going!

Sunday, 3 November 2013

One step closer to heating

The Bakan boys (our local, friendly electricians and heating experts) were in for most of the short week last week, connecting up the air-source heat pump, the hot water cylinder, buffer storage and all the lovely manifolds, pumps and gauges. Even though we have yet to turn it all on (reasons below), I have to say, it looks fantastic. Lots of nice technology, really neatly done, all on a background of rustic walls. I think we've the prettiest technical room in the village, at least...


In the meantime, I've got a little further with the repointing and plastering, so this cellar room is nearly complete. Just needs power in for lights and sockets, a new window, a door, one more wall to re-point, then insulate the ceiling, oh, and paint the plaster, probably, and we're done! It'll be the first complete room in the house!
Just a little more left to do on this wall...
Heating-wise, my next job is to get the wall heating panels up. After getting some pointers from Sace Bakan, I made a start yesterday evening, sticking the panels on the already-insulated walls of the living room. Nice and easy, but just need to put a couple sockets more in, and a little base work, then can continue. Once that's done, we'll get the pipes in and turn on the heating for the first time.


Sunday, 13 October 2013

Life in the trenches

The past three weeks have been mostly occupied with two tasks. One, getting the basics ready for the air-source heat pump installation, and related to that, getting some of the final dirty work in cellar 4 completed, so the heating equipment can be given a home.

For the cellar work, it's been an almost nightly task to do a few hours repointing or plastering to get the back area completed before the hot water tank and buffer reservoir (puffer speicher, so not sure what the English  technical term is!) are put into place. It's not hard work, but extremely slow. I'm using a mix of trass cement and sand, as trass doesn't have the lime elements of normal cement that can lead to leaching of salts in a damp cellar wall, plus it's a bit more breathable than plain Portland cement. In those areas where the old plaster has been too difficult to completely remove I've simply plastered over with lime-cement plaster.

After blasting, before repointing.
After repointing.
The end where the equipment will live.
"Rustic" plastering. Will be nicer once painted :)
After three weeks of this, I have about 65% of cellar 4 done. Like I said, slow... But I think it does look a lot better than before, and once completely dried out will be nice and bright. Actually, when I look back on how the cellar looked when we first bought the house, it's quite the transformation!

Last weekend we experienced life in the trenches. Our friend, master electrician Sace, and his son, popped over on the Friday with a mini digger and we began preparing the plinth for the heat pump to stand on, as well as the trenches for laying the necessary pipes into the cellar. Working well into the dark, we got as far as building the shuttering for the plinth, with the intention of pouring concrete the next day. Unfortunately, it rained the whole night, and pretty much all Saturday, but that didn't stop us. By Monday night, we'd gotten as far as getting the pipes in, but ran out of sand, as we'd then found one of the pipes leading to the rainwater cistern had been laid with a slope in the wrong direction. That added a couple of hours work, as we excavated it and reset it so water would actually flow towards the cistern from the barn roof...

Now that's a drill! Needed one more hole for the pipes.
Saturday... wet. Photo's don't do the mud justice.
Backfilling in the dark
Rough-fitting through cellar wall. Still needs to be sealed.
Slippery when wet.
So, the next job will be getting the heat pump from the front of the house to its permanent home behind the barn, and filling in the remaining trenches. I'm away for most of the week, so I'm hoping it will be left till my return.
The heatpump and water cylinders

Sunday, 22 September 2013

The Last Blast

Almost two years ago, I had my first experience using a sand-blaster. We used it a lot for cleaning off oak beams in the upper levels of the house, to great effect, and a cursory clean of the walls in the cellar. Since then, the blaster went on its merry way, but we needed to call on its services again this weekend, to do a proper job on the cellar walls. Initially, we'd thought to simply clean the walls enough so that new plaster would hold, but then decided it would be better for the walls if they were left as natural as possible so any dampness coming from the foundation would find it easier to escape. My wife had spent a couple of weeks knocking the remaining plaster off the walls, but they needed a deep clean before we could repoint.

My old friend.
It's dirty, sweaty work, but enjoyable in its own way, as you see results quick. Well, once the dust has settled, which takes some time when blasting clay and plaster off walls in an enclosed space. But, it needed to be done before the heating equipment gets installed in cellar 4, and that, we hope, will be done in time for winter.

First, a look back to the type of thing we got back in late 2010.

Cellar 1
Cellar 4
Then how they looked a week ago.

"Cellar 2" is in two parts, the entry hall, and behind that as mall vaulted cellar. The left wall of the entry hall, as seen below, has been plastered over, with a damp-proof membrane under the plaster. This was disastrous for the wood beam resting on the wall, hence a good idea to leave it free. After removing the plaster and some of the old mortar (more like clay), it looked better, but pretty manky dirty. We thought it had potential, though.
Cellar 2/Entry hall
Cellar 2/Entry. The sandstone had already been blasted earlier.

In cellar 4, the easternmost former stall, we'd already began with the waterworks installation, so everything had to be wrapped up and protected prior to blasting.  There's quite a difference, even at the stage shown below, compared to what it was like when we first got it as seen above!

Cellar 4
Cellar 4
And the post-blasting shots. I think Cellar 1 is unrecognisable compared to what it was like in 2010. But it's still the messiest of all the cellars, and the floor will eventually have to be replaced, but that's on the very long finger.
Cellar 1 now.
The entry hall is important, and it's a pity the stones aren't nicer, but I think it should come out well in the end.

Cellar 2/Entry hall
Cellar 2/Entry hall
Cellar 4 is going to be fun to repoint...


Cellar 4
Cellar 4
 Difficult as it is to see through the dust, it wasn't helped by the visor on my mask getting frosted. Glad I have a backup, but I won't be blasting again!


All that was left to do was the cleanup. The used sand went to the neighbour's chickens...


Sunday, 4 December 2011

Rising tide

Our shiny new concrete floor in the cellar was finished a couple of weeks ago. I'd been meaning to take some photos, but not under the circumstances I found tonight. For the past three days we've had rain for the first time in over a month, following the driest November since 1920. While doing a quick inspection tonight, I found that there is water rising around the walls of the cellar, getting over the damp proof membrane, and coming out onto the surface. Not good!

Photo is a little poor, as auto-focus doesn't like the dark.

I'm hoping this is temporary, as there is a rainwater down-pipe on the other side of this wall that is not fully connected. I'm hoping this is contributing, and not that the lower level of the new floor has somehow gone below a water table we were as yet unaware of. It is over a metre below ground level at this point, so it could well be, and the fact there is now hardcore, topped by a membrane and then 15cm of concrete might just be fording water up the wall more than before, when it was just clay and stones. Frankly, I'm worried, as this just cannot be good for the foundations or the walls.

Small pools of water at foot of wall, coming over damp/proof membrane.
 In the same cellar, towards the front, one of the walls is completely wet, not just damp, even a metre up. It's possible that a broken gutter on the adjoining barn is splashing onto the outside wall and it is coming through and down, rather than from the ground, but it's a lot of damp.
East gable, south end, and a big patch of wet wall.

See? Wet, not just damp.
Meanwhile, this is the first real rain test the finished roof has had. The inside is still not finished with paper and laths for the insulation, so we can see the back of the fascia boards, insulation boards and everything still. Which is good, as it can be seen that just below the small downpipe from each of the dormers, there is water somehow getting under the tiles and flowing down the inside of the fascia boards. Definitely localised to each of the four downpipes. From the outside, it can be seen that water has come out from under the eaves. I'm pretty sure that at least this is fixable, but not sure if it's a problem with the flashing or the tiles, or splashback from the main gutter (unlikely). Tomorrow, I'll ask for the tiles to be removed to we can see where it's coming in. This definitely has to be fixed before cellulose insulation is blown in in the next couple of weeks!

Water coming down under the tiles, and over the fascia board.
Really don't need these issues now.